

Have you ever made a bracelet before? I feel like most of us that grew up in the 80s or 90s have definitely made a friendship bracelet! Embrace unique style and sustainable fashion with our DIY bracelet ideas featuring upcycled and homemade techniques.
There’s something uniquely gratifying about creating your bracelets. It’s a brilliant showcase of your creativity, style, and personality.
he friendship bracelet never seems to lose any popularity and remains, to this day, a great DIY project which takes little materials to complete. The most popular form of friendship bracelets are the woven or braided ones which often feature a multitude of colors with designs of varied difficulties.
Friendship Bracelet

To make a woven friendship bracelet you will need the following supplies:
- Embroidery Floss (or similar yarn)
- Scissors
- A pin or hook – to hold your threads while you braid
- Patience!
Depending upon your choice of design, your braiding or weaving will require different levels of patience – it can be tough to get into the flow of weaving or braiding your threads and keeping them from tangling.
Friendship bracelet designs can span anywhere from a simple 3 stranded braid to 8 or more strands creating a woven design which might contain a flat pattern or raised design. There are heaps of tutorials for weaving friendship bracelets but one of our favorite designs creates heart shapes in the woven pattern.
Beaded Bracelet

One of the simplest ways to make a bracelet is to string beads onto some tigertail or cord and add a fastening. Beaded bracelets never seem to go out of fashion as there are many variations of this simple design. Smaller beads will of course, create more delicate bracelets and large beads will create something which is a bit more statement.
To make a beaded bracelet you will need:
- Beads – any shape or size
- Cord or wire suited to your bead size and project
- A fastening – lobster claw, spring ring, toggle, magnetic or barrel are probably the best suited to a beaded bracelet
- Crimps – if using tigertail
- Jewelry pliers
- Calottes – to hide crimps
- Jump rings
- A lighter – if using cord knots to attach the fastening
- Cutters or scissors
- A bead board – optional, to lay out your design before making
Beaded bracelets can be made to look as simple or extravagant as you please, it all depends on your choice of beads. Laying out your design is a great way to start, as it allows you to envision the final piece and make changes without needing to restring your whole design.
If you decide to use larger beads, make sure to keep checking the length around your wrist as you might need more cord than you expected due to the bulk of the bead. Depending upon the size and material your beads are made from, you may want to consider different techniques or finishes.
DIY Name Bracelets
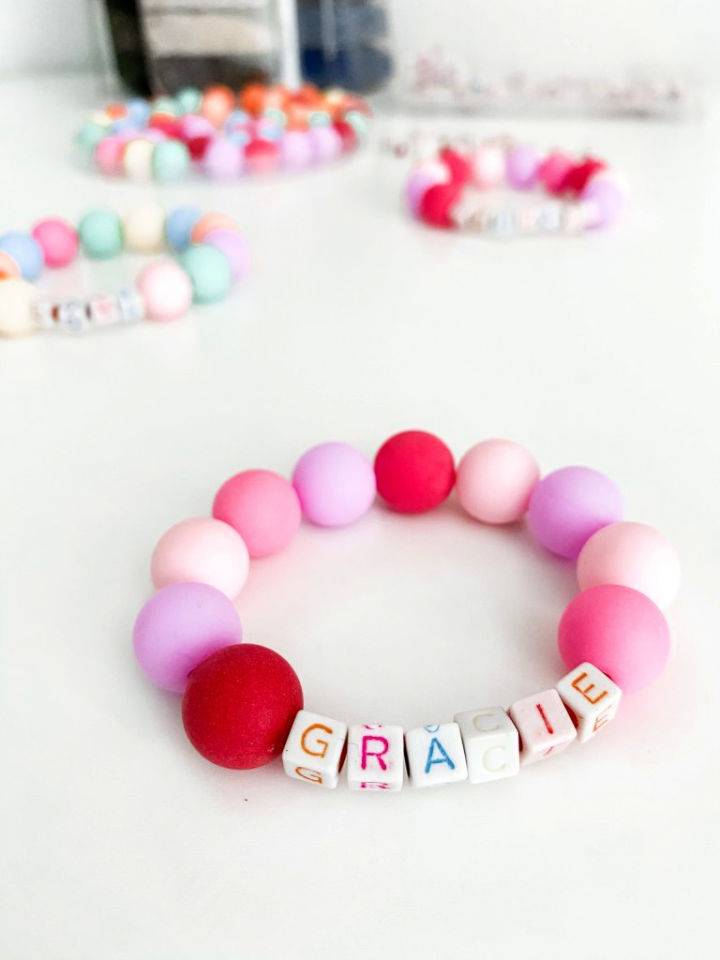
Making DIY name bracelets is an engaging and personalized craft that allows you to express your style or convey meaningful messages. With a simple tutorial from Our Thrifty Ideas, you can learn to assemble these charming accessories using decorative and letter beads, elastic string, and crimp beads. Perfect for gifts or a fun activity with kids, the process involves stringing beads, securing them with crimp beads, and ensuring a snug fit. Master this craft with helpful instructions and add a touch of uniqueness to your jewelry collection. Our Thrifty Ideas
DIY Glass Cabochon Bracelet
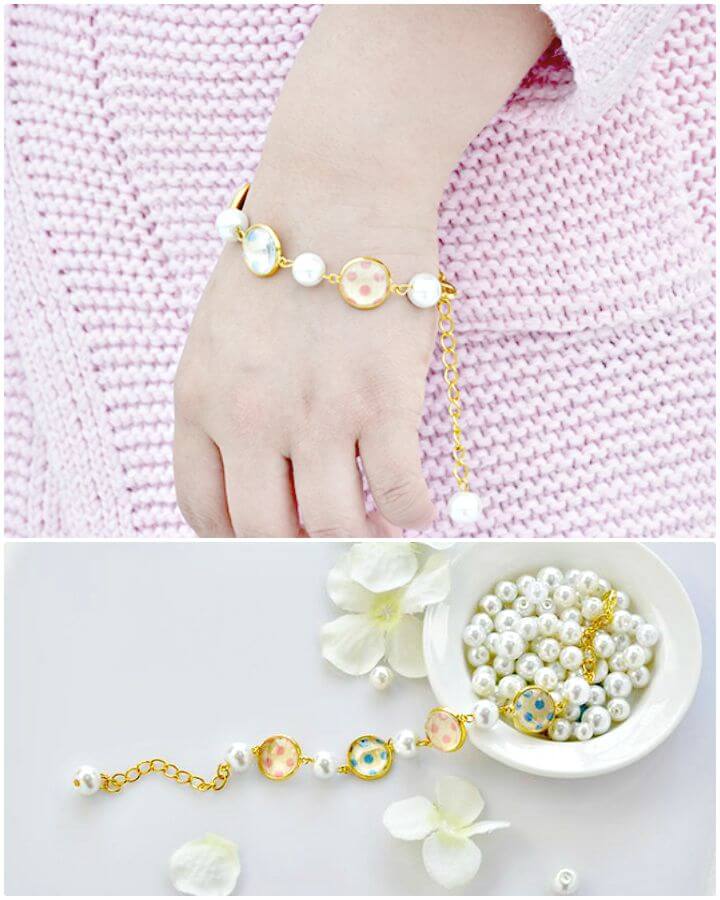
Making a glass cabochon bracelet adorned with pearl beads can be a satisfying DIY project. Pandahall‘s tutorial guides crafters through an easy, three-step process to make an eye-catching accessory perfect for girls. First, the bracelet’s base is crafted with scrapbook paper and a glass cover, then pearl beads are added for elegance.
Finally, chains and clasps bring the piece together. This crafting guide is practical and engaging, ideal for those seeking a fun jewelry-making activity. With clear instructions and a list of materials, anyone can make a stunning bracelet to wear or gift. Dive into crafting with confidence, and let your creativity shine with this beautiful bracelet project.
Boho Leather Bracelets
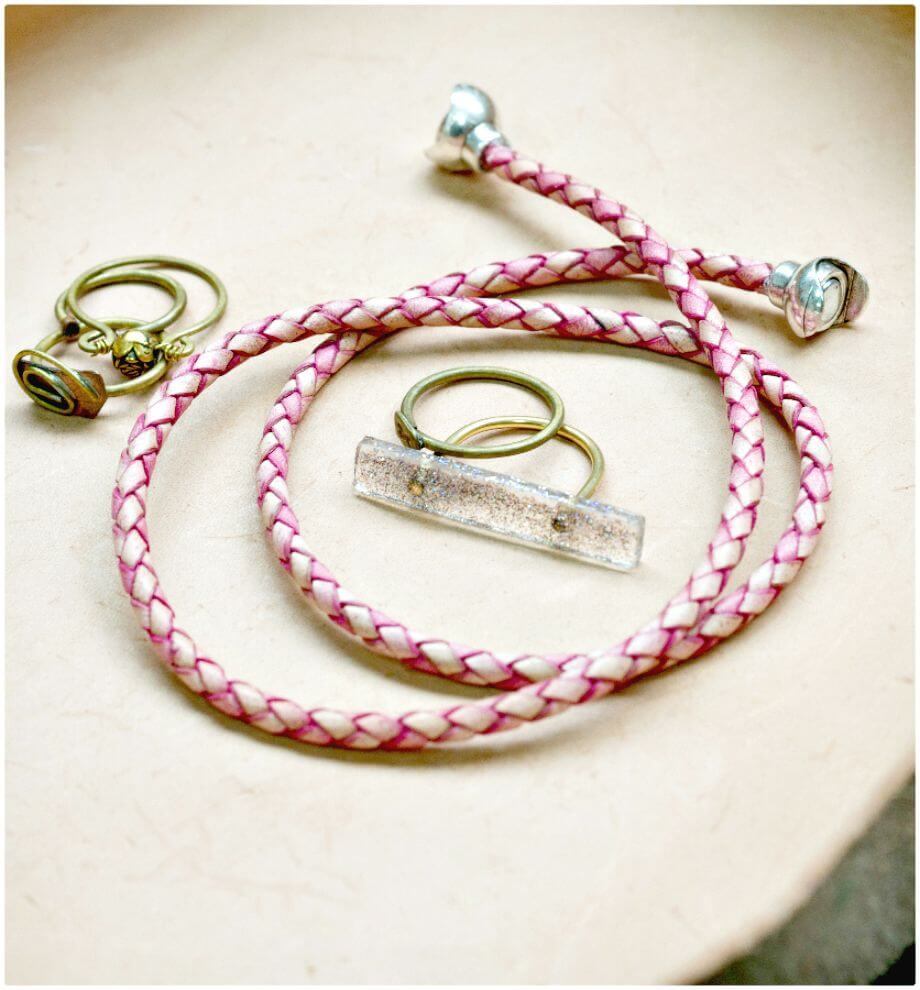
Crafting a boho leather bracelet is a stylish way to express your creativity and add a touch of carefree elegance to your accessories. At Pop Shop America, you can learn how to make these easy, chic bracelets with just a few supplies, including antique corded leather, super soft suede cord, magnetic clasps, E6000 glue, and sharp scissors. No need for wire cutters or complicated tools; the process is straightforward.
Memory Wire Bracelet

This might just be one of the easiest bracelet projects to make as there are just a few steps involved. The memory wire already comes in a spiral which is the perfect size for bracelet making and all you need to do is thread your chosen beads onto the wire and secure each end with a loop.
The tools and materials you will need are:
- Memory wire – in the bracelet size
- Beads – any size or shape
- Charms – optional addition
- Round nose pliers
- Memory wire cutters
To begin, you will want to decide how many rows of the coiled wire you would like for your bracelet and use memory wire cutters to cut the length. Using round nose pliers, make a small loop at one end of the wire length to hold your design on the wire and start beading. You can add charms throughout your design or just add one charm to each of the loops you created at either end of the wire.
DIY Popsicle Stick Bracelets
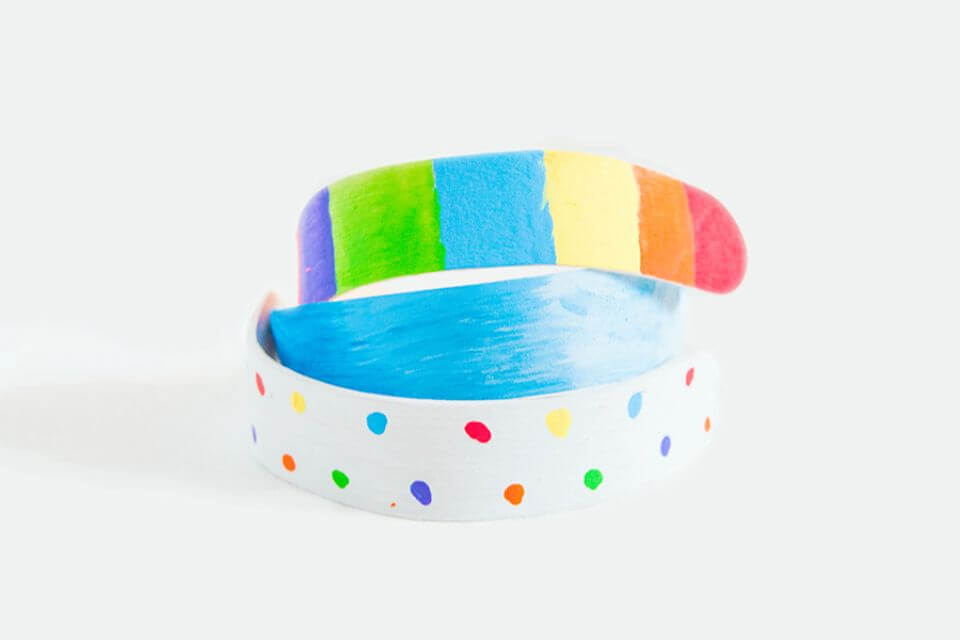
Are you in need of a fun and engaging craft to keep kids entertained indoors? Homan at Home presents a simple yet delightful activity: popsicle stick bracelets! Perfect for a rainy day or chilly weather, this craft requires only jumbo popsicle sticks, a pot of boiling water, a glass to shape the sticks, and decorative materials like paint or washi tape. Boil the sticks, bend them to form, and once dry, let creativity flow as children decorate their unique accessories. They’ll beam with pride wearing their handmade bracelets. Dive into this easy-to-understand guide for an enjoyable crafting experience.
Mars Bracelet
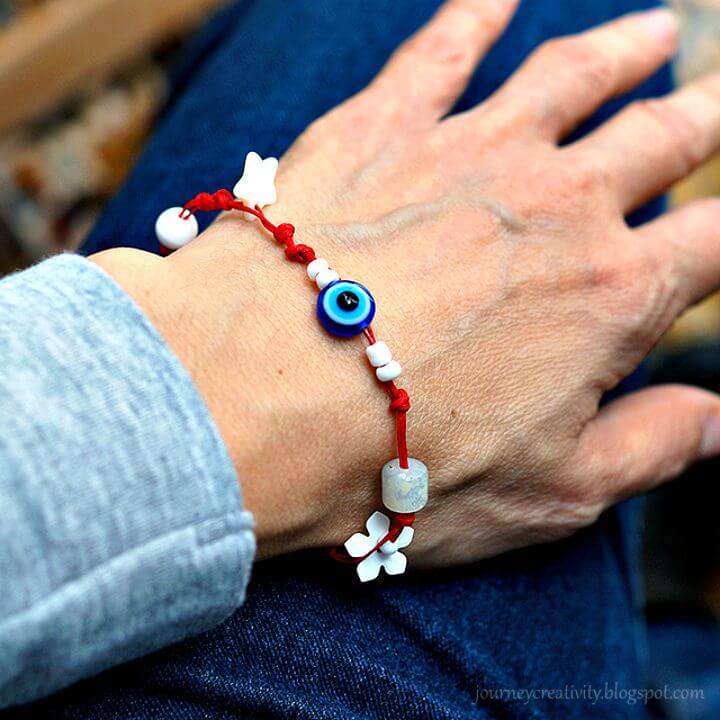
Discover how to craft a charming “March” bracelet with Journey into Creativity‘s step-by-step guide. This DIY project invites you to replace traditional white thread with an assortment of white beads for a unique touch. Gather a red waxed cord, small white beads, and an evil eye bead to get started.
Make a loop at the cord’s midpoint, thread a bead, and secure it with a knot. Repeat with additional beads, adjusting the bracelet length to fit your wrist comfortably. Finish with a larger bead that fastens through the initial loop. Dive into crafting this special bracelet and welcome March with a touch of creativity and tradition.


